Changing your FreePBX server’s IP address requires careful configuration to prevent SIP registration failures and service disruptions. This comprehensive guide walks you through the complete process on Debian 12.
Method 1: Changing IP Address via Network Interfaces (Recommended)
Step 1: Backup Current Network Configuration
Before making changes, create a backup:
sudo cp /etc/network/interfaces /etc/network/interfaces.backupStep 2: Edit Network Configuration File
Open the network configuration file:
sudo nano /etc/network/interfacesLocate your primary network interface (typically eth0, ens18, or enp0s3) and modify the static IP configuration:
# Primary network interface
auto eth0
iface eth0 inet static
    address 192.168.1.100      # Your new IP address
    netmask 255.255.255.0      # Subnet mask
    gateway 192.168.1.1        # Default gateway
    dns-nameservers 8.8.8.8 8.8.4.4  # DNS servers
Important Notes:
- Replace
192.168.1.100with your desired IP address - Ensure the gateway matches your network
- Update DNS servers according to your network setup
Step 3: Apply Network Changes
Restart the networking service:
sudo systemctl restart networkingAlternative method (if the above doesn’t work):
sudo ifdown eth0 && sudo ifup eth0Or perform a complete system reboot for guaranteed changes:
sudo rebootStep 4: Verify New IP Address
After restart, confirm the IP change:
ip addr show eth0Test network connectivity:
ping -c 4 8.8.8.8Method 2: Update FreePBX Configuration
After changing the network IP, you must update FreePBX to recognize the new address.
Update Asterisk SIP Settings
Reload FreePBX modules:
fwconsole ma reloadRegenerate all Asterisk configurations:
fwconsole reloadUpdate Network Settings in FreePBX GUI
- Access FreePBX web interface at:
http://NEW_IP_ADDRESS - Navigate to Settings → Asterisk SIP Settings
- Update the following fields:
- Bind Address: Set to
0.0.0.0or your new IP - External Address: Update if using NAT
- Local Networks: Add your new subnet
- Bind Address: Set to
- Click Submit and Apply Config
Verify Asterisk Bindings
Check SIP bindings:
sudo asterisk -rx "sip show settings" | grep "IP address"For PJSIP (FreePBX 17 default):
sudo asterisk -rx "pjsip show settings" | grep bindRestart FreePBX Services
Complete the update:
sudo fwconsole restartTroubleshooting Common Issues
Issue 1: Cannot Access FreePBX GUI After IP Change
If you cannot load the FreePBX web interface after changing the IP address, the firewall may be blocking your new connection.
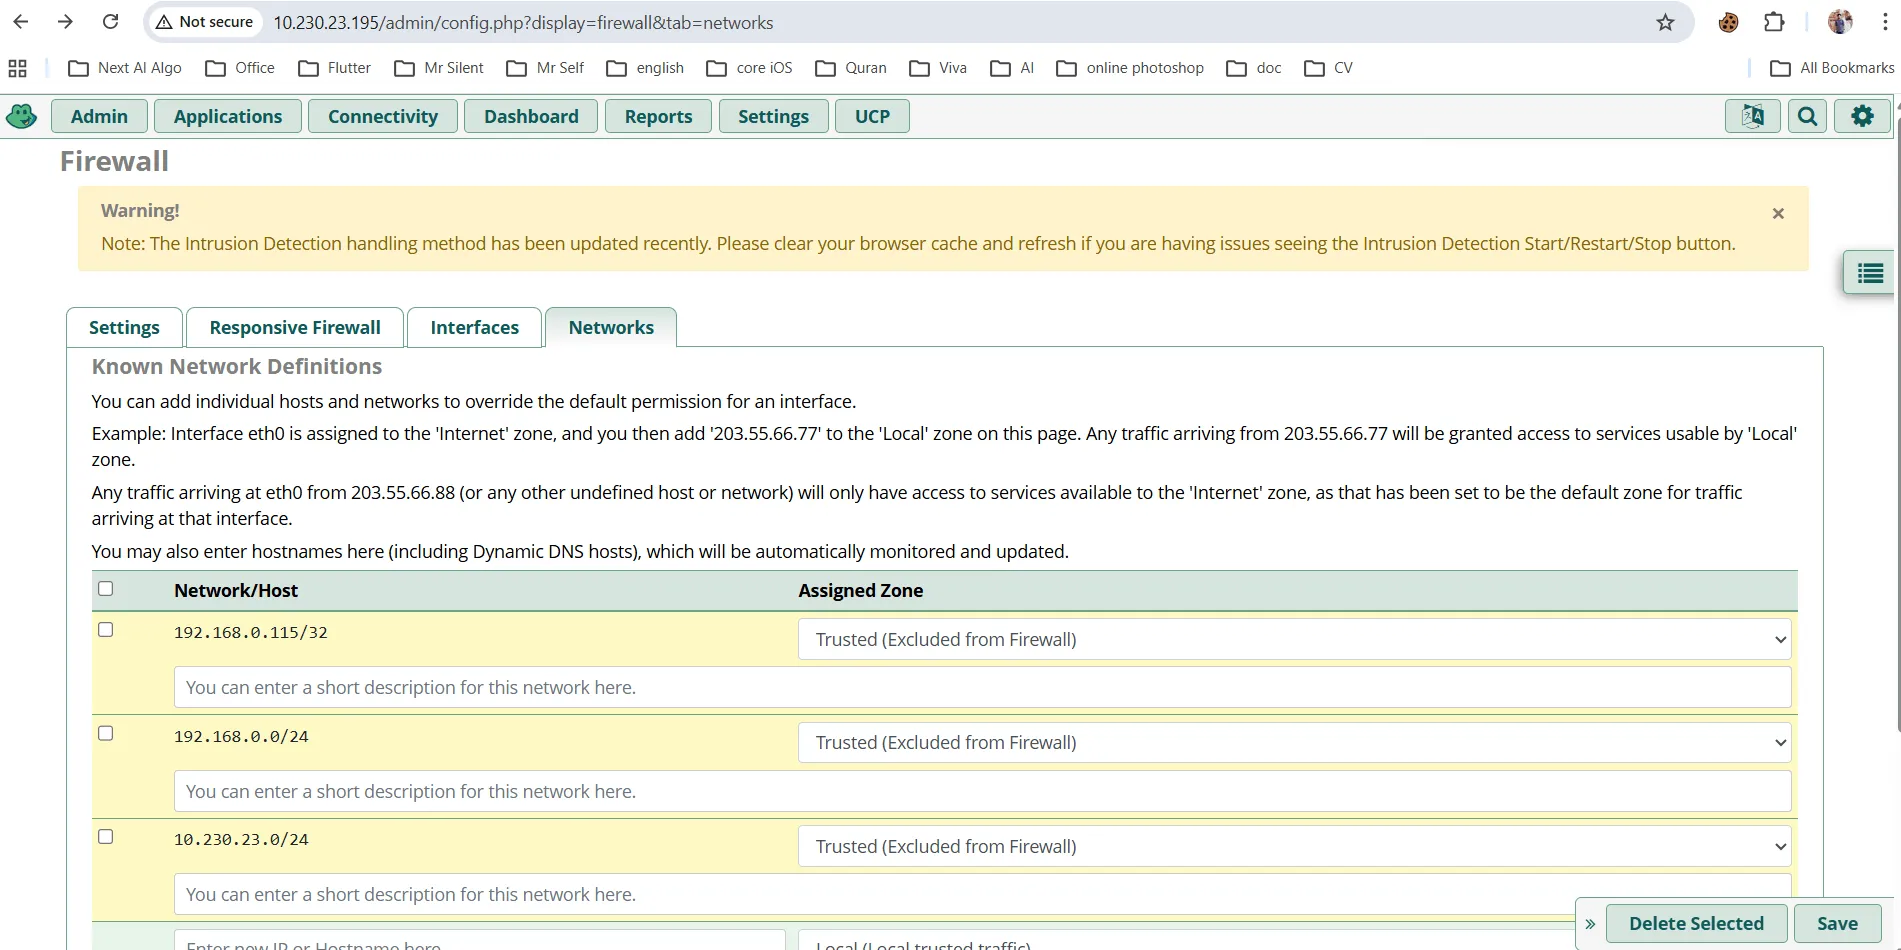
Solution A: Add Trusted Network in FreePBX
- Access via SSH
- Navigate to Admin → System Admin → Port Management
- Add your new network to the trusted list
Solution B: Update IPTables Firewall Rules
Allow your new IP address or subnet:
# Allow specific IP address
sudo iptables -I INPUT -s 10.230.23.179 -j ACCEPT

# Or allow entire subnet
sudo iptables -I INPUT -s 10.230.23.0/24 -j ACCEPT
Save IPTables rules permanently:
sudo netfilter-persistent saveSolution C: Temporarily Disable Firewall (Testing Only)
sudo fwconsole firewall disable⚠️ Warning: Only use this for troubleshooting, then re-enable immediately.
Issue 2: SIP Phones Not Registering
Update SIP/PJSIP bind address:
sudo nano /etc/asterisk/pjsip.transports.confEnsure transport binds to the correct IP or 0.0.0.0:
[transport-udp]
type=transport
protocol=udp
bind=0.0.0.0:5060
Reload PJSIP:
sudo asterisk -rx "module reload res_pjsip.so"Issue 3: One-Way Audio or No Audio
Update RTP settings:
sudo nano /etc/asterisk/rtp.confSet correct RTP address:
rtpstart=10000
rtpend=20000
In FreePBX GUI:
- Settings → Asterisk SIP Settings → NAT Settings
- Update External Address and Local Networks
Post-Change Verification Checklist
✅ Network connectivity test:
ping -c 4 google.com✅ FreePBX service status:
fwconsole chown
fwconsole reload
systemctl status freepbx
✅ Asterisk connectivity:
sudo asterisk -rvvv
core show settings
✅ Test SIP registration:
- Register a test extension
- Make a test call
- Verify two-way audio
✅ Check trunk connectivity:
- Verify external SIP trunk registration
- Test inbound/outbound calls
Additional Security Recommendations
After changing your FreePBX IP address:
- Update fail2ban whitelist:
sudo nano /etc/fail2ban/jail.local- Review firewall rules:
sudo fwconsole firewall rules-
Update SSL certificates if IP-based
-
Notify VoIP providers of IP change if using IP authentication
-
Update DNS records if applicable
Alternative: Using NetPlan (Ubuntu-based Systems)
If you’re using a Ubuntu-based FreePBX installation with NetPlan:
sudo nano /etc/netplan/00-installer-config.yamlConfiguration example:
network:
  version: 2
  ethernets:
    eth0:
      addresses:
        - 192.168.1.100/24
      gateway4: 192.168.1.1
      nameservers:
        addresses: [8.8.8.8, 8.8.4.4]
Apply changes:
sudo netplan applyConclusion
Changing your FreePBX IP address on Debian 12 is straightforward when following these steps carefully. Remember to:
- Always backup configurations before making changes
- Update both network settings AND FreePBX configuration
- Test thoroughly after changes
- Update firewall rules appropriately
By following this guide, you can safely migrate your FreePBX server to a new IP address without service disruption.